

These bags fit the bill. Right there in the store I opened up one of the bags and let the creative juices flow. In my head I could see the makings of a really fun and big project. The grands were going to love the idea!
How to make a
Giant Gingerbread Village
using a BIG paper sack:
Purchase 30 gallon paper lawn and leaf bags.
I found mine in Big Lots ($2.00 for a 5 pack) and today I found them in Target on clearance for just $1.49 for a pack of five. Of course I picked up more!

Open up the bag and square up the sides.
The bags are so big that my grands had to climb inside to open them up. They didn't mind doing that one bit! When I made my sample bag I used a hot iron and pressed the wrinkles out of the bag. I would suggest doing this if you are doing the craft with older children.

Place some kind of weight in the bottom of the bag. It could be a gallon zipper bag of rocks. I used a 13" rounds of plywood since I had a bunch of them in my resources.
Once the weight is in place fill the bag 3/4 of the way full with crumpled newspapers. Don't overfill the bag because you want your sides to be straight. Work the papers and the outside of the bag for a nice square shape.

Fold the top of the bag over to create the roof.
Square up the sides and staple in place on both sides.

This is what the bag should look like.

I purchased a roll of wrapping paper with a candy strip. Cut paper to cover the folded over edge to create one side of your roof, over the peak, and the other side of the roof. I cut a scalloped edge along the peppermints to add a fun finish to the eaves. Run your pinched fingers along the top of the roof for a nice crisp peak. Staple along the sides. How cute is that?

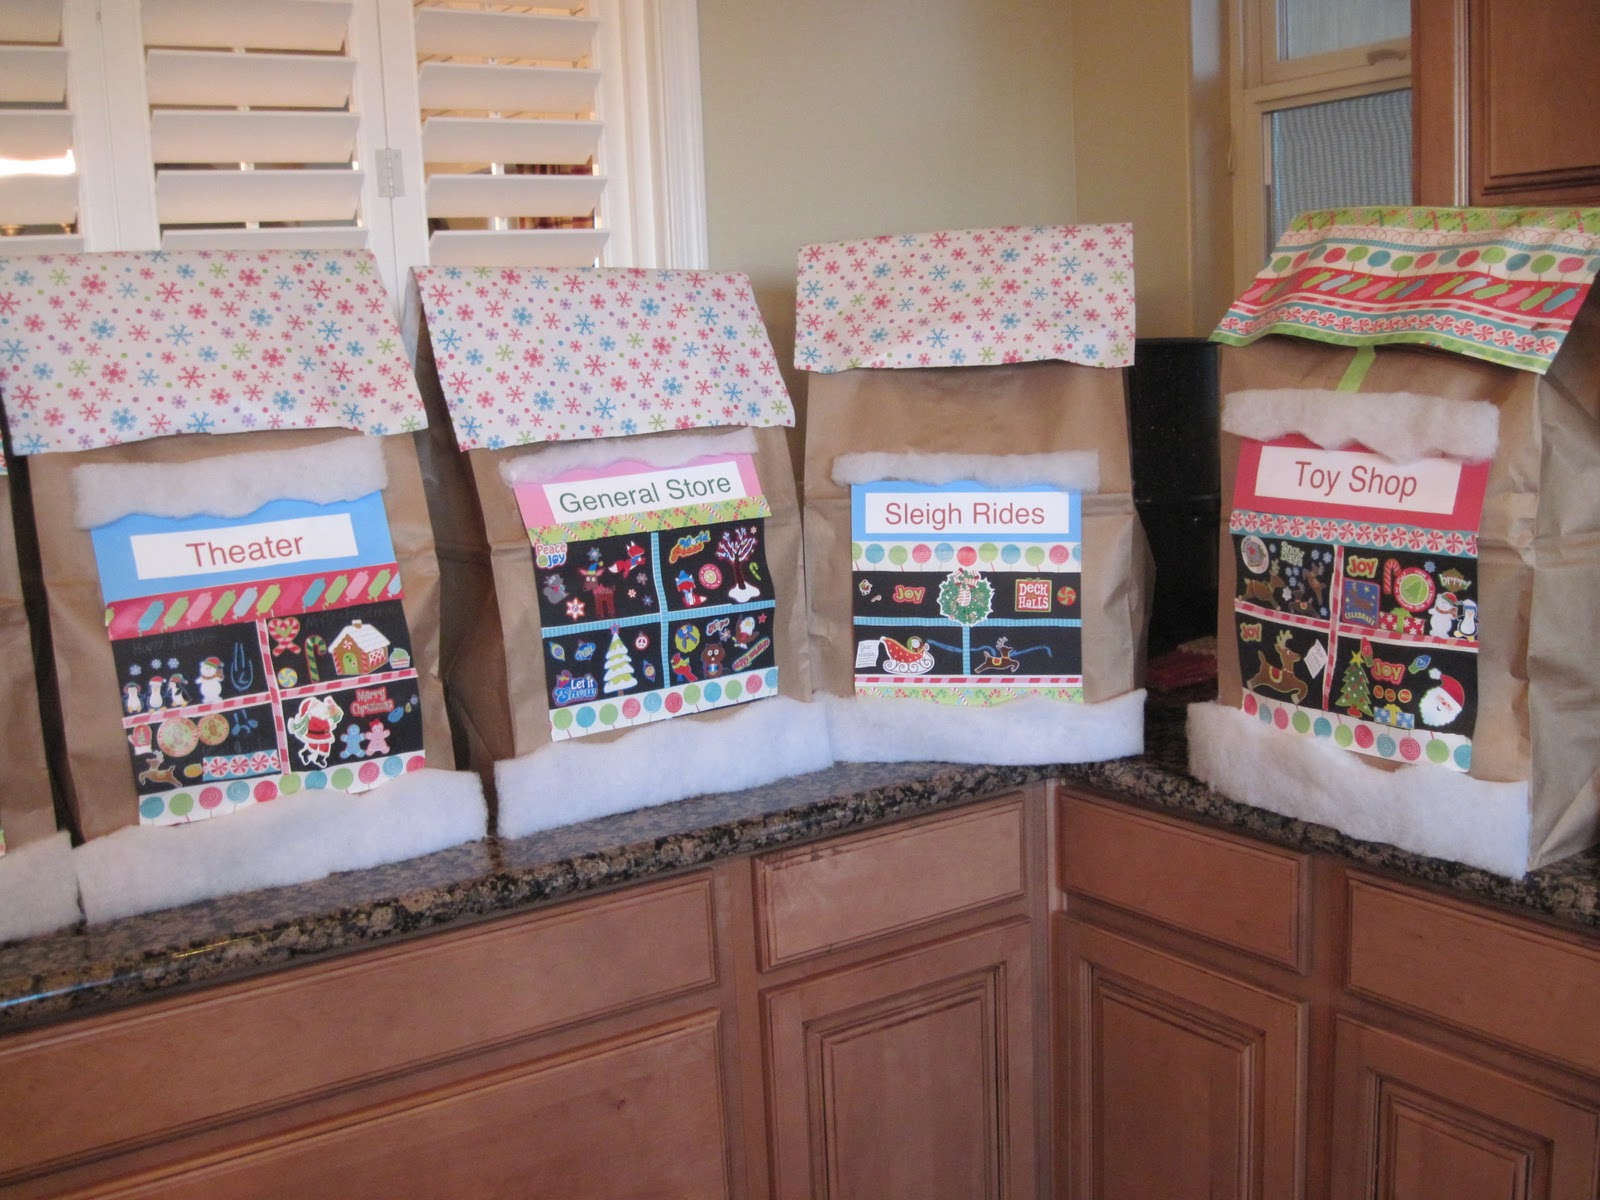
This is my sample giant gingerbread "place of business" for our village.
Cut a block of black construction paper in any size you would like to create your store front. You use the black paper as your guide. Layer over it with your business sign, window decor, and window panes. Choose how many panes you would like and create them using coordinating paper and glue in place with a glue stick. I used a stripe from the same wrapping paper. I printed out the names of the businesses on my home computer with red and green ink on white card stock then matted them with a coordinating piece of colored card stock.
Trim out the window anyway you would like. I cut strips from the wrapping paper to top the window and to finish off the bottom.
I decorated the store front top windows with cutouts from the wrapping paper. I used chalk to draw the strings that the ornaments are hanging from.
Because this is a Post Office I filled the bottom windows with packages and letters.
Complete the entire store front (over the black paper) before sticking it to your bag.

When the front windows are complete use a hot glue gun and glue into place. Cut strips of batting to create some snow above the business sign and along the bottom. Glue into place using hot glue. You could also use cotton balls and craft glue.
I was working with young children on this project. Older children could decorate the sides too and add many more details. Ice cycle garland is really cute hanging from the eaves. I tried it.... so I know. I just didn't have enough for all of the kids. (shhhhh)
The kids had a blast creating their own giant gingerbread businesses for our village. I supplied lots of Christmas sticker books for decorating their store fronts.


And the finished project.
The kids loved the Giant Gingerbread Village!
These giant bags were a great find.
They could create a village any time of the year.
The windows would be cute decorated for:
Valentine's Day
St. Patrick's Day
Easter
4th of July
Halloween
or.... Fall Harvest
Don't forget about this weeks Ho...Ho...Ho...liday giveaway.
Check it out here for a chance to win one of three prizes:
What a creative and easy activity. I think I'll try it with lunch sacks first. My grandkids would love it.
ReplyDeleteI must admit that I wouldn't have thought of this activity. Grandma Shelley, you are too creative!
ReplyDelete